Showing posts with label Recipes. Show all posts

Tuesday, December 11, 2012

Easy Meal: Tomato-Cheese Toastie


Today I would like to share a very simple recipe with you. It is a delicious, light vegetarian meal that even non-vegetarians are sure to love, mainly because it features one of everyone's favorite foods on the planet - cheese.

I like to call this a Tomato-Cheese Toastie.

Imagine - you are sitting at home and you are light on ingredients, but want a delicious meal. This is where The Ramen Ninja steps in.

I'm going to show you how to make a meal using two very basic ingredients: tomatoes and cheese.

Photo Credit: Reimanpub.com

What You'll Need:

1 preheated oven set to broil 500F degrees.
1 oven-safe pan
1 spatula
1 plate

Ingredients:
1 hamburger bun or 2 slices of sandwich bread
1 tsp balsamic vinegar
1 tsp olive oil
1 tomato - sliced
2 slices of Mozzarella cheese (or whatever kind you have on hand)
mayonnaise
salt
pepper
garlic powder
paprika
Italian seasoning

Step 1:
Preheat the oven and lay out your bun open-faced on the pan.

Step 2:
Toast the bun in the oven for about 1-2 minutes on each side.

Step 3:
Spread the mayo onto the bun.

Step 4:
Place one slice of tomato on both halves of the bun.

Step 5:
Put one half teaspoon of balsamic vinegar on top of each tomato slice.

Step 6:
Sprinkle a small amount of each of the above seasonings: salt, pepper, paprika, garlic powder, Italian seasoning. A little goes a long way here because you are using so many different seasonings - so just a pinch of each will do.

Step 7:
Put one half teaspoon of olive oil on each slice of tomato.

Step 8:
Finally, lay one slice of cheese on top of each slice of tomato and put your sandwich open-faced back into the oven.

Step 9:
Allow the sandwich to toast in the oven for 3-4 minutes. It is done when the cheese starts bubbling.

Step 10:
Remove the sandwich from the oven and serve onto a plate using a spatula. Enjoy!


Thursday, May 17, 2012

Quick Snack: Popcorn


Popcorn is one of my favorite snacks. However, I am not talking about microwave popcorn. I am talking about the popcorn you make on the stove. Compared to microwave popcorn it is cheaper and healthier. Mainly - it's cheap. One 16 oz. bag of unpopped kernels should last you practically forever.


Things you'll need:
1 large pot with a tight-fitting lid
1 large serving bowl
1 stove

Ingredients:
about 1/4 cup popcorn kernels
1-2 tbs. salt
about 1/4 cup vegetable or olive oil
2 tbs melted butter (optional)

Step 1:
Pour the popcorn kernels into the pot. You should put enough kernels in so that there is a single, even layer of kernels covering the bottom of the pot.

Step 2:
Pour in the oil. Note that the above measurement is approximate. The kernels don't need to be swimming in oil. The same rule applies for the oil as the popcorn kernels - you only need enough to cover the bottom of the pot.

Step 3:
Cover the pot and set the heat to high.

Step 4:
Once the popcorn begins to pop, reduce the heat to a low-medium setting. Once the pot has begun to fill with popped kernels, the popping will slow. Listen for it to slow down to about 3-4 seconds between pops and completely remove it from the heat.

Step 5:
Pour the popcorn into the bowl.

Step 6:
Add salt and shake the bowl so that the salt will evenly distribute throughout the popcorn. Repeat this step as necessary. If you are using butter, add it first so that the salt will stick.

That's all there is to it! This recipe makes enough popcorn for at least 4 people to share. This makes a great snack for movies, parties or any other time!

Friday, May 11, 2012

Stock Your Pantry: Rice


Today, I want to give you a quick tip on something to keep in your pantry at all times - rice!


Rice is like a super food - it is super healthy, super cheap, super delicious and super easy to make. The average price you can expect to pay in the store for long grain white rice is usually around $1.50 for 2 lbs - sometimes less, depending on where you go.

If you use a lot of rice, go somewhere where you can buy it wholesale and you will pay practically nothing for a whole lot of rice (although I wouldn't suggest this if you live in a dorm - you wouldn't have anywhere to store it all!)

It is not just the price you pay at the counter that makes rice the budget cook's best friend. Rice is so versatile it can be used for almost anything. I have used rice for soups, stews, side dishes, main entrees, you name it! It is also very filling, which is a huge plus if you are pinching pennies.

 If you don't have large amounts of any one ingredient, you can throw them all together and fry it in a pan with some cooked rice, and it makes for a delicious and easy entree. When you are using rice, it doesn't take many ingredients at all to make a great meal or snack.

White rice is usually the best option because it has a very short cooking time - around 20 minutes. Brown rice - which is the healthier choice - actually takes between 45-50 minutes. So, if you often find yourself in a hurry, go with the white rice.

 If you are willing to wait, take the healthy road and go with the brown rice. Also, if you do decide to go with brown rice, you can cook lots of it on a day when you have some extra time on your hands and store it all in the fridge once it's cooked. This is actually a great idea for any kind of rice you are using, especially if you plan to make dishes like fried rice.

Additionally, rice is a great option for college life, considering rice cookers are allowed in most dorms.

Comment and share what you use rice to make!


Quick Meal: Huevos Rancheros


I remember coming home from work one night dead tired. I was so tired that I couldn't even begin to think about cooking. To make matters worse, the fridge was practically empty - a gallon of milk, eggs, and some random leftovers from a recent party, such as dip and salsa. Luckily, my girlfriend knew exactly what to do with the scant ingredients we had available at the time - she whipped up some very simple and delicious huevos rancheros.


Sometimes referred to as a salsa omelette, huevos rancheros is simply egg and salsa - at least in most cases.

Things you'll need:
1 spatula
1 frying pan
1 plate
1 bowl
1 whisk or fork

Ingredients:
2 tbs butter or cooking spray
1/4 cup milk (optional)
4 eggs
about 1/2 cup salsa

Step 1:
Crack the eggs into the bowl and add the milk. Beat with the whisk or fork until well-blended.

Step 2:
Heat the frying pan to medium heat and melt 1 tbs of butter (or grease the pan with cooking spray).

Step 3:
Add the eggs to the pan and allow them to sit and cook. Do not stir them or disturb them in any way. You want the eggs to maintain a flat, round shape. The eggs will begin to cook through and should begin to solidify within about 5 minutes. You can use the spatula to carefully lift the edge of the omelette and peek underneath to check the doneness.

Step 4:
The eggs will be ready to flip once they are no longer wet on the bottom. Some of that wetness should also be drying up on top. Once the eggs have reached this point, flip them. Add the other tbs of butter to the pan as you flip, or grease it again with the cooking spray. Continue cooking until it the eggs are cooked evenly.

Step 5:
Once the eggs are done cooking, remove them from the pan and place them on a plate. Pour the salsa into the middle of the omelette and then fold it over.

You're all done!

I have made this same recipe before, only I  made my own salsa with chopped up bell peppers, onions, tomatoes, cilantro and lime. However, this recipe is still delicious if you just use salsa from the jar. Also, huevos rancheros is traditionally served with black beans on the side, but this is optional, of course.

Enjoy!


Wednesday, May 9, 2012

Easy Meal: English Muffin Pizzas


Don't waste your money on those frozen mini pizzas! They aren't healthy, and they really don't taste the best.

Why not make your own pizza?

Maybe you don't have the time or ingredients to make your own pizza dough, but that doesn't have to stop you.  You can just use something you may already have - English muffins!


Things you'll need:
1 knife
1 spoon
1 cutting board
1 oven (this is a great toaster oven recipe!)
1 cookie sheet (or any other oven-safe dish)

Ingredients:
2 English muffins (if you don't have English muffins, you could substitute with biscuits, buns, etc.)
4 tbs pizza or pasta sauce
1/2 cup shredded cheese

Step 1:
Heat the oven to 350F degrees.

Step 2:
Cut the muffins in half.

Step 3:
Using a spoon, put about 1 heaping tbs. of sauce onto each slice of the muffin and spread it evenly.

Step 4:
Top each muffin with your desired amount of shredded cheese.

Step 5:
Place the muffins on your oven-safe dish and put them in for around 12 minutes. You really only need to leave them in long enough for the cheese to melt and for the muffin to be thoroughly heated.

You're done! This recipe is laughably simple and you could easily add your own variations. Try topping your mini pizzas with some ham, pepperoni, olives - you name it!

Monday, May 7, 2012

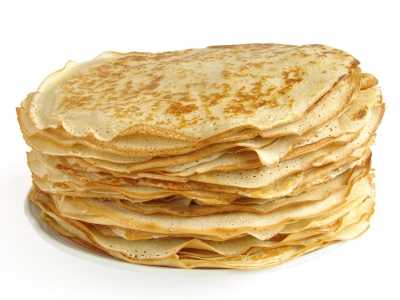
Quick Snack: Easy Crepes


Crepes are one of my favorite things to make. They are very simple, cheap, versatile and delicious - everything the tight-budget cook looks for.

You can make dessert crepes, breakfast crepes and dinner crepes, it all depends on what you want to stuff them with.


Things you'll need:
1 bowl
1 measuring cup
1 fork
1 stove
1 small-medium size frying pan
1 spatula

Ingredients:
1/2 cup pancake mix
1/2 cup flour
2 eggs
1 1/4 cups water
About 2-3 tbs butter, or a can of nonstick cooking spray

Step 1:
In the bowl, combine the eggs and water and whip them together.

Step 2: 
In the measuring cup, combine the flour and pancake mix.

Step 3:
Gradually add the flour/pancake mix to the eggs/water mixture in the bowl. Make sure you whip the mixture together with a fork as you add the powdered ingredients. By combining the ingredients in this manner, you avoid ending up with lumpy batter.

Step 4:
Heat the pan to medium-high heat.

Step 5:
Once all the ingredients are mixed together and free of lumps, coat the frying pan with butter or cooking spray.

Step 6:
Drizzle some of the batter into the pan with one hand, while holding the frying pan by the handle in your other hand. As you add the batter, shift the frying pan around so that the crepe batter evenly coats the bottom of the pan. You are doing this to avoid all of the batter pooling on the bottom and becoming thick like a pancake. The heat of the pan will cause the batter to stick to the sides as you move the pan around. This method produces a nice, thin crepe.

Step 7:
Using the spatula, flip the crepe over so that the other side will cook. It usually takes about 30 seconds per side. You will know when you are ready to flip the crepe the first time when the batter on top begins to dry up and the edges of the crepe that are up on the sides of the pan begin to fold in towards the center.

Step 8:
Repeat steps 6 and 7 until you use up all the batter. Make sure you add a little butter or cooking spray to the pan before you add more butter, or else the batter will stick to the pan.

That's all there is to it! Your first couple of crepes may not turn out perfectly, but don't give up. Crepes take a little practice, but they are super easy, once you get the hang of it.

Now all you need to do is add a little fruit, chocolate syrup and some whipped cream, and you have a delicious dessert/breakfast.

Comment and let us know what you decide to fill your crepes with!

Sunday, May 6, 2012

Quick Snack: Popcorn Eggs


Well, no, they don't really have popcorn in them. This is a way to whip up a quick snack in the microwave, and the popping sound comes from the cooking of the eggs.

Note: This picture has garnishes, which are completely optional, but you get the idea.


Things you'll need:
1 microwave-safe plate
1 microwave-safe cup
1 fork

Ingredients:
Eggs
Salt and pepper

Step 1:
Crack however many eggs you will be cooking into the cup.

Step 2:
Cover the cup with the plate and place it in the microwave.

Step 3:
Set the microwave to cook on high for about 30 seconds to 1 minute per egg. You will need to standby to check for doneness. You will start hearing a popping sound when they are close to being done. It will be somewhat loud, but don't be scared! This is supposed to happen - it's in the name, remember?

Step 4:
When the eggs are ready, remove the cup from the microwave. You will know that they are done when there isn't a lot of wetness in the eggs. Be careful when removing the cup from the microwave, it will be hot.

Step 5:
Using the fork, break up the eggs until they look like the small bits in the picture.

Step 6:
Season the eggs with the salt and pepper.

That's it! You are all done! Now, you don't really have to crumble up the eggs if you don't want to. If you prefer to keep them intact, that is perfectly fine.

This method is kind of like what's used in the EggWave - super easy!

The appeal to breaking the eggs up is that you can pour them over a salad - or you could even try making your own egg salad sandwiches. No hard-boiling required.

I have not tried using them in this way, but I will give it a shot and let you know what I come up with, or you could do it yourself and share your results!

Saturday, May 5, 2012

Party Snacks: Cheeseburger dip


I know that football season is several months away, but there are still tons of great events coming soon that I am sure people will be throwing parties for (can anyone say 2012 Summer Olympics?).

That's why I wanted to post this great recipe for cheeseburger dip.
Obviously, there doesn't have to be an event to make this recipe, but it sure does liven up a party.


Things you'll need:
1 crock pot (you could use a large pot on the stove as an alternative).
1 frying pan
1 strainer
1 cutting board
1 knife
1 can opener

Ingredients:
1 lb. lean ground beef
2 10 oz. cans of Original Rotel mix
1 32 oz. box of Velveeta

Step 1:
Set the crock pot on medium heat.

Step 2:
Using the frying pan, brown the ground beef - this should take about 10 min.

Step 3:
Using the strainer, drain the meat.

Step 4:
Take the brick of Velveeta cheese out of all the packaging and set it on the cutting board. Using the knife, cut the brick into small cubes. Then, add them to the crock pot.

Step 5:
Once the cheese has melted, open the cans of Rotel and drain them.

Step 6:
Mix the ground beef and Rotel into the melted cheese.

Step 7:
Now set the temperature on the crock pot to the lowest setting - this is usually called something like 'Keep Warm' - and you are ready to serve this great dip!

Some people like their dip a little cheesier - in this case, I will use half the amount of Rotel and ground beef. If you are expecting a bigger party, you could also double the amount of cheese.

The great thing about this dip is that it is so simple, you can very easily modify it. Go wild! See what kind of spin you can put on it and share it with us!

Friday, May 4, 2012

Quick Snack: Flavored Rice


I tend to get hungry between meals, and it can be a pain to cook food when you have a lot of work to do. If I stood in the kitchen and cooked every time I got hungry, I would probably be in there all day.

So, I like snacks like flavored rice because they are quick, easy and don't require you to stand over the stove while they cook.

This is also one of those recipes that really only requires a couple ingredients - bonus!


Things you'll need:


1 measuring cup
1 medium-sized pot with a tight-fitting lid
1 fork

Ingredients:


1 cup white rice
2 tsp (or 2 cubes) chicken bouillon
salt and pepper
1 tbs butter or olive oil (optional)

Step 1:
Pour 2 cups of water into the pot and add the chicken bouillon. Sometime for extra flavor, I substitute 1 cup white wine for 1 cup of water.

Step 2:
Bring the water to a rolling boil and add the rice and butter/olive oil.

Step 3:
Cover the pot with the lid and set the heat to low. Allow to simmer for 20 minutes.

Step 4:
Once the rice has finished simmering, remove from heat and fluff with a fork.

Step 5:
Season the rice with salt, pepper or any other seasonings you have around. I like to sometimes add Vegeta - a mix of spices that I usually keep on hand for soups, stews, etc.

This recipe yields about 2 cups of cooked rice - not a bad amount of food for a snack or side dish. You can also add bits of cooked chicken to this and it could become a main entree - just get some canned chicken and mix it in on Step 2.

Enjoy!

Thursday, May 3, 2012

Gourmet Dorm: Ceviche


I was trying to get a little inspiration today by looking at the lists that most colleges and universities put out on banned appliances. The lists vary, but they cover most things. If you are going by the list, you are allowed to have a mini fridge and sometimes a microwave.

It didn't occur to me right away that there is a delicious meal that you can 'cook' using only the fridge - ceviche.

If you don't know, ceviche is a traditional Peruvian dish made with seafood that is sort of like sushi, minus the rice. While it is not really raw, the cooking process allows the fish to maintain the freshness that is much like sushi.


Things you'll need:


1 large bowl (as large as you can fit into your mini-fridge)
1 cutting board
1 knife
1 mini fridge
1 strainer
aluminum foil or plastic wrap

Ingredients:


These will vary, depending on your tastes, but most seafood works. I will post what I usually use.

12 oz peeled, deveined shrimp
3-4 small tilapia fillets
3 medium onions, sliced
6 limes (at least) you need these for juicing. If that's too difficult to come by, get the pure lime juice at the grocery store - usually comes in a 16 fl oz bottle.
1 bundle fresh cilantro
3-4 small tomatoes, diced
2 avocados, diced (optional)
salt and pepper
2 tsp garlic powder


Step 1:
Rinse the seafood in the strainer. If it is froze, thaw it out. If you put frozen seafood in your ceviche it will not turn out right.

Step 2:
Cut the tilapia into bite-sized chunks. Put the cut up tilapia and shrimp into the bowl.

Step 3:
Slice the onions and dice the tomatoes and avocados and put them into the bowl.

 Step 4:
Finely chop the cilantro and add it to the bowl.

Step 5:
Squeeze the lime juice into the bowl. You need enough juice to cover the seafood. This is because the acidity of the lime juice "cooks" the seafood. So you want to make sure the seafood is covered so that it cooks properly.

Step 6:
Add the salt, pepper and garlic powder and mix the contents of the bowl.

Step 7:
Cover the bowl with tin foil or plastic wrap and place it in the fridge for about 30 minutes. With this particular mixture, I do a shorter cooking time. Other people prefer around 4 hours. It all depends on how you like it cooked. If you are using something like raw scallops, do 4-6 hours.

Step 8:
Remove the bowl from the fridge and serve in bowls.

What I like about this dish is that you can serve it up fairly quickly, but if you are going to be gone for a while, you can leave the ceviche in the fridge and it will be ready for you when you get home. If the flavor comes out a little bland, be sure to add a little more salt, pepper and garlic powder.

 Enjoy!


Wednesday, May 2, 2012

Easy Snack: Microwave Baked Potato


In keeping with my latest trend of posting helpful dorm cooking tips, I will share a quick and easy recipe for you: baked potatoes.

Since most college dorms do have a communal kitchen equipped with an oven, it is possible to make baked potatoes the conventional way. However, this is not always the most convenient way - especially if you are living in a college dorm.


Things you'll need:


1 microwave
1 plate
1 fork
1 knife

Ingredients:


1 potato (you can use just about any kind - golden, russet, you name it)
Salt and pepper
1 tbs sour cream (optional)
1 tbs butter (optional)

Step 1:
Wash the potato.

Step 2:
Using the fork, poke holes in the potato.

Step 3:
Place the potato on a microwave-safe plate and nuke it on high for about 5 minutes.

Step 4:
Flip the potato over and put it back in the microwave for another 5 minutes.

Step 5:
Using the knife, cut the potato in half and add the salt, pepper, butter and sour cream. I like to also add cheese and bacon bits, but these are always optional.

Enjoy! This is a great study snack that is more than filling enough to keep you satiated between meals.


Monday, April 30, 2012

Quick Snack: Strawberry-Banana Smoothie


As sort of a follow-up to my post about the blender, I decided to post my favorite recipe for smoothies. The reason I like this recipe is that it is very easy to make,quick to throw together and it is also very healthy.


The recipe below is for a single-serving.

Things you'll need:

1 blender
1 measuring cup
1 spoon
1 straw
1 cup

Ingredients:

4-6 stemmed strawberries
1 banana, peeled and broken into small, bite-sized pieces
1/2 - 1 cup ice cubes, depending on how icy you like it
1/4 cup yogurt (you can use strawberry, vanilla, plain - it's up to you)
1/4 cup orange juice
1 Tbs. honey (you can substitute this with sugar if you don;t have any honey)

Step 1:
Place the fruit, yogurt, orange juice, and honey into the blender.

Step 2:
Blend until the mixture is completely smooth. You may need to stop the blender every so often and use a spoon to scrape the mixture off the sides of the blender so that all the ingredients are mixed thoroughly


Step 3:
Now, add half of the ice and blend until there are no chunks remaining. You may have to keep using the spoon to scrape everything off the inside of the blender walls as before.

Step 4:
Add the rest of the ice and blend again until there are no chunks remaining - you don't want any chunks of ice obstructing your straw!

That's it! Now you can serve your tasty snack in a cup with a straw. If you have one of those personal blenders, it should ave a travel-sized cup with a lid that you can take off the blender base to bring it with you.

This snack is a great way to get some quick, healthy calories into your system before you head off to class, work, or the gym.

Monday, April 23, 2012

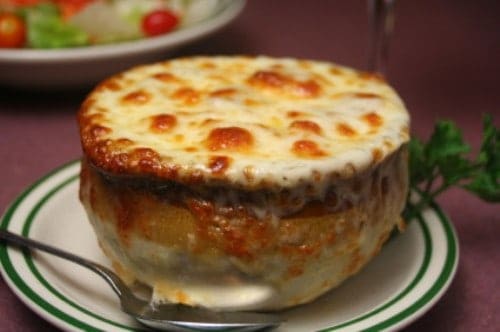
Easy Meal: French Onion Soup


French onion soup is one of those classic staples that is surprisingly simple to make. It uses very few ingredients and is a great way to make your own hardy meal on the cheap.


Things you'll need:

1 large pot with a lid (large enough for 9 1/2 cups of fluid with plenty of room to spare)
1 cutting board
1 knife
serving bowls or mugs that are about 4-5 inches in diameter (about the diameter of a slice of french bread)
1 oven heated to 425F degrees
1 nonstick  flat cookie sheet or pizza pan
1 toaster

Ingredients:

1/2 cup of butter (that's one whole stick)
2 tsp white sugar
2 tbs flour
3 cups thinly sliced onions
7 cups beef broth (7 tsp. beef bouillon and 7 cups water)
1/2 cup dry red wine
2  cups water
1 loaf french bread
8 oz. sliced Swiss cheese
1 tsp. thyme
1 bay leaf
salt and pepper to taste

Step 1:
In the large pot, melt the butter and stir in the sugar.

Step 2:
Add the sliced onions to the pot and cook them in your butter/sugar mixture for about 10 minutes. This process is called caramelizing.

Step 3:
Add the flour and stir until well blended.

Step 4:
Add the water, wine, bay leaf, thyme, salt, pepper and broth and bring to a boil.

Step 5:
Reduce the heat and simmer for about 1 hour. Honestly, the longer you leave it to simmer, the better. I once left it simmering for closer to three hours and it turned out fantastic, but 1 hour should be fine.

Step 6:
Heat the oven to 425F degrees.

Step 7:
While the soup is simmering, slice the french bread into 1 inch slices and lightly toast them. If you don't have a toaster, use the oven.

Step 8:
Ladle the soup into bowls and place a slice of toasted bread over the top of each, then lay a slice of Swiss cheese on top of the toasted bread.

Step 9:
Place the bowls on a cookie sheet and bake them in the oven for about 5-10 minutes - until the cheese melts.

There you have it! I hope you enjoy!


Empty Pantry: Fried Rice

No, you cannot make a meal with no ingredients. However, if that pantry of yours is starting to look a little low, there are some meals that can be made with very few ingredients. This is one that uses some of the most basic things you might find lying around the kitchen: fried rice.


Fried rice is fairly simple. There are just a few tricks to making it come out right. I love fried rice because it is easy to make, doesn't take many ingredients, and can be eaten as a side dish or entree.

Things you'll need:

1 large frying pan or wok
1 small frying pan
1 small bowl
1 fork
1 knife
1 cutting board
1 measuring cup
1 large pot with a tight-fitting lid
1 large zip-top bag or plastic container with a lid

Ingredients:


2 eggs
2 tbs water
2 tbs butter
2 tbs vegetable oil
2 onions - chopped
4 cups white rice
1/4 cup soy sauce
2 cups chicken - cooked (optional)

Step 1:
This is a step that needs to be done well in advance for this to turn out properly. Using the pot, add the white rice with 8 cups of water. Bring to a boil and then immediately lower to a simmer and cook covered on low for 20 minutes.

Step 2:
Once the rice is done, it needs to be put into a container and refrigerated until it is completely cold. This takes several hours, so you need to do it well in advance. There is an optional method, but I will warn you that the rice will not turn out as well. Rather than refrigerating the rice, you can use a strainer and rinse the rice with cold water. I have tried this alternate method, but the texture of the finished dish just isn't quite right.

Step 3:
Using a fork, beat the eggs in a small bowl and add the 2 tbs. of water to thin it out a bit.

Step 4:
In the large frying pan, heat the vegetable oil over medium heat and add the onions. Cook for about 3-5 minutes.

Step 5:
Now add the rice, chicken and soy sauce. Stir fry for about 8 minutes.

Step 6:
While the rice is frying, cook the eggs in the small pan with the butter.

Step 7:
Once the egg is fully cooked, cut it into small pieces and add it to the fried rice in the pan.

Step 8:
Fry the rice for about another 3-5 minutes and serve.

This is a fairly simple dish and it may take a little practice to perfect. The rice can end up coming out a little sticky and tends to clump if you have not allowed it to dry out enough in the fridge. I love fried rice because it is a great way to piece together a dish with what you have on hand. You can make it completely vegetarian if you have no chicken, in which case you can add peas, carrots, broccoli, or just about anything else, for that matter. Enjoy!


Sunday, April 22, 2012

Easy Meal: Crock Pot Lasagna


I posted earlier about the convenience of having a crock pot in the kitchen. Today I am going to show you just how convenient it really is.

You may or may not have tried your hand at making lasagna before. If not, don't worry. Lasagna is one of the easiest dishes you can make, however, you may not have the time or energy to put into a lasagna when you are coming home after work or school.


With a crock pot, that problem is solved. All you have to do is set an extra 20 minutes aside before you leave the house in the morning.


Things you'll need:


1 crock pot
1 strainer
1 large frying pan
1 knife
1 cutting board

Ingredients:


1 lb. ground beef
3 tbs. minced garlic (I use a lot of garlic in my cooking, you can always reduce, based on your taste)
1 medium sized onion, diced
1 diced green bell pepper
8 oz. chopped mushrooms
32 oz. tomato or spaghetti sauce
12 oz. ricotta cheese
1 lb. lasagna noodles - uncooked
1 lb. shredded mozzarella cheese

Step 1:
Brown the ground beef in the frying pan along with the onion.

Step 2:
Just before the beef is completely browned, add the garlic. Once the meat is browned, drain the meat using a strainer.

Step 3:
Put the ingredients back in the pan and add the sauce, pepper and mushrooms. Heat this mixture for about 8-10 minutes.

Step 4:
Spoon a layer of the sauce mixture onto the bottom of the crock pot.

Step 5:
Place a layer of the lasagna noodles on top of the sauce layer. Unless you have a perfectly rectangular crock pot, you are going to have to break the noodles so that they fit. I usually use a knife on a cutting board so that they don't shatter and get all over the place.

Step 6:
Spoon some of the ricotta cheese and layer a bit of the mozzarella cheese on top of the lasagna noodles.

Step 7:
Repeat the layers of sauce, cheese and noodles until you have reached the top of the crock pot. The last layer that you should place is the cheese. I usually reserve most of the mozzarella for the top layer.

Step 8:
Cover the crock pot and set it on low for about 5 hours. Depending on your specific type of crock pot, you may be able to set it on a very low setting for longer. Also, some crock pots have a timer so that it will start cooking at a certain time. Just time it based on how long you will be away.

That's it! Now just go to school or work and you will be coming home to the smell of some lovely lasagna! I have only attempted this recipe when I was sure I would not be away from the house for much more than five hours. I do not know if it would burn if left for much longer. If someone would comment and let me know if they have any experience, it would help! Thanks!


Easy Meal: Chicken Noodle Soup

Ever since I last posted about bouillon, I was trying to think of a good recipe that uses it. The first thing that came to mind was my recipe for chicken noodle soup. It is really easy and really quick to make. It is also really cheap. All the ingredients listed here should cost you less than $20 at Walmart, Target, etc.


Things you'll need:


1 large pot w/lid (large enough to hold 9 cups of water with room to spare)
1 medium-sized pot
1 strainer
1 large wooden or Teflon  spoon
1 measuring cup
1 large knife
1 cutting board
1 can opener

Ingredients:


1 13oz. can chicken breast
1 tablespoon butter or olive oil
1 lb. noodles (Just use what you have on hand. I have used penne, spaghetti, even white rice)
1/2  cup chopped onion
1/2 cup chopped celery
9 cups chicken broth (if using bouillon: 9 tsp chicken bouillon with 9 cups water)
1 cup sliced carrots
1 tsp. dried basil
1 tsp. dried oregano
1 tsp. celery salt
3 tsp. minced garlic
salt and pepper

Step 1:
Make sure you have chopped your onions and celery and are ready to use them.

Step 2:
Heat the large pot on the stove over medium-low heat. If you are not using butter, add olive oil. Immediately add the celery and onions.

Step 3:
Saute the celery and onions in the pot until they are tender - this should take about 5 minutes. Stir occasionally.

Step 4:
Pour in the chicken broth and add the rest of the ingredients to the pot except for the noodles.

Step 5:
Bring the soup to a boil and then reduce it to a simmer and cover it. It needs to simmer for at least 20 minutes.

Step 6:
Using the medium-sized pot, boil enough water so that you can cook your pasta.

Step 7:
Boil the pasta, strain it and set it aside.


Note: The reason that I boil the pasta and keep it separate is so the noodles don't soak up all the broth in the soup.

Step 8:
Once the soup has simmered long enough you can serve your soup. Just spoon some of the noodles into a bowl and then ladle some soup on top.

I make large amounts of this soup because I like to freeze it so I have some on hand. If this makes too much soup for you, just adjust it based on how many people you need to cook for. If you cut the recipe in half, it should make enough soup for 4 people.

When storing left over soup, I use separate containers for the soup and the noodles.


Thursday, April 19, 2012

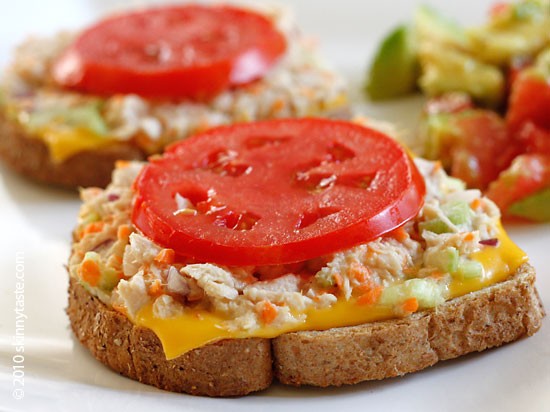
Quick Meal: Tuna Melt


I love it when you can whip up a delicious meal from the random things you happen to have lying around the kitchen. I know that it can be difficult to make something from a recipe when there isn't much in the house. So, I am always in search of recipes that call for only a few basic ingredients. Here's one of them - the tuna melt sandwich.

Things you'll need:


1 hot oven (500F degrees)
1 flat pan or oven-safe dish
1 spatula
1 small mixing bowl
1 can opener

Ingredients:


Hamburger buns or sliced bread
1 tomato - sliced for sandwiches
1 tbs olive oil
1 can tuna
2-3 tbs mayonnaise
2 tbs balsamic vinegar
salt and pepper
oregano (optional)
1/4 cup diced celery (optional)
1 small onion diced (optional)
4 slices cheese (swiss, cheddar, montery jack - just about anything works)

Step 1:
Set the oven to broil. It should automatically set it to about 500F degrees.

Step 2:
Open the can on tuna and drain it.

Step 3:
Pour the tuna into the mixing bowl and add the mayonnaise.

Step 4:
Add the diced celery and onion to the tuna and mayonnaise in the mixing bowl.

Step 5:
Add the balsamic vinegar to the mixture and season with salt, pepper and oregano

Step 6:
Use the olive oil and grease the pan/dish that is going into the oven.

Step 7:
Place the pan with a couple slices of the bread into the oven and lightly toast it. Be careful! The temperature is high enough to burn this bread very quickly. You should only leave it in for 30 seconds to a minute (depending on which rack the pan is on). Just stand by and keep an eye on it. Remember to flip the bread so both sides get toasted. And be sure to only lightly toast one side, because this will be going back into the oven.

Step 8:
Remove the toasted bread from the oven and spoon a couple scoops of the tuna mixture onto each slice of bread (on the lightly toasted side), lay on a slice of tomato and finally, lay a slice of cheese on each half of the sandwich.

Step 9:
Return the sandwich to the oven long enough that the cheese melts. Once again, this shouldn't take too long so stand by.

Step 10:
Remove the sandwich from the oven and use the spatula to remove each half of the sandwich from the pan.

That's all there is to it!

Wednesday, April 18, 2012

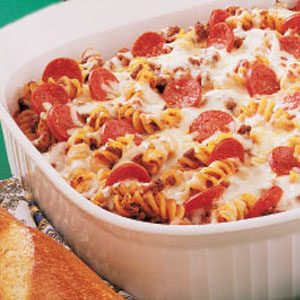
Want pizza? No dough? No problem!


The other night I was craving some pizza, but quickly ran into a problem. I had no dough, and didn't feel like taking the time to make it. So, I decided to get a little creative and use pasta - why not?


Here's the recipe that I whipped up - I hope you like it!

Things you'll need: 


1 nonstick or glass baking dish
1 hot oven (350F degrees)
1 medium pot
1 strainer

Ingredients:


1 lb. pasta (I used penne, but you can use just about anything you have laying around)
24 oz pasta sauce (at the time of this post, Target had 24 oz. jars of Ragu on sale for $0.69 each!)
16 oz. shredded mozzarella cheese

The rest is up to you, based on what you have/want.

I just so happened to have some pepperoni, green bell peppers, mushrooms, and black olives, so I added these to my pasta pizza.

Step 1:
Preheat the oven to 350F degrees

Step  2:
Boil water in the medium pot and add salt. Make sure you have enough water to completely cover all your pasta.

Step 3:
Add the pasta and cook it until it is al dente. The penne took about eight or nine minutes to cook to al dente.

Step 4:
Strain the pasta.

Step 5:
Put a few scoops of the pasta in the bottom of the baking dish - enough to evenly cover the bottom of the dish.

Step 6: 
Pour some pasta sauce on top of the layer of noodles in the dish.

Step 7:
Sprinkle some of the mozzarella cheese on top of the sauce. At this point you should also add some of the other toppings that you may have on hand.

Step 8:
Scoop another layer of noodles on top of your sauce/cheese/toppings layer and repeat steps 6 and 7 until you fill the dish. Your last layer should be cheese and toppings.

Step 9:
Cover the dish with aluminum foil and bake in the oven for 20-30 minutes. Since the pasta is already cooked, all you have to do is bake it long enough for the cheese to melt and the sauce to heat up. You may need to adjust this cooking time to be a bit higher if you have ingredients like green bell peppers.

Step 10:
Remove aluminum foil and bake for another 5 minutes.


That's it! Enjoy!

I like using a pretty deep dish for this pasta, as it basically turns out like a super-deep dish pizza. Also, I have found that this dish is easier to serve in 'slices' if you use lasagna noodles.


Wednesday, April 4, 2012

Easy Meal: Macaroni Salad


As the title implies, this is actually a very easy meal to make. The thing I like about it (aside from the fact that it is very cheap) is that you can have it for almost any meal of the day.


Another really nice thing about macaroni salad is that you can add just about anything you want to it. It can be vegetarian, it can have meat, and it also really doesn't matter what vegetables you add - or  what kind of pasta, for that matter.

Things you'll need:


1 medium-sized pot
1 large bowl
1 strainer
1 large spoon

Essential Ingredients:


1 lb. macaroni pasta (or whatever kind of pasta you have laying around)
About 1/4 cup olive oil or up to 1/2 cup mayo
About 1/3 cup balsamic vinegar
Assorted meats and/or vegetables

Optional Ingredients:


This list could pretty much go on for days, since everyone's macaroni salad is different. However, I will list the types of things that I like to add.

Green and black olives
Pickles
Carrots
Tomatoes
Celery
Chickpeas
Genoa Salami
Pepperoni
Parmesan and Mozzarella Cheese
Salt
Pepper
Italian Seasoning
Garlic Powder

As I said before, you don't have to stick to this list.

Step 1.
Boil the pasta in the medium-sized pot.

Step 2.
While the pasta is boiling, slice up whatever vegetables, meats and cheese you are going to use.

Step 3. 
Once the pasta is done boiling, put it in the strainer and rinse it with cold water.

Step 4. 
After the pasta is sufficiently rinsed, dump it all into the large bowl.

Step 5.
Add all of the chopped vegetables, meats and cheeses to the bowl of  pasta.

Step 6.
Add balsamic vinegar or mayo.

Step 7.
Season the salad with salt, pepper, garlic powder, etc.

Step 8. 
Stir the pasta well so that all of the ingredients are coated with the seasoning and vinegar. You can always add more of anything as you see fit if it looks like there isn't enough to cover everything.

Step 9. 
Add the olive oil and stir again. Note: I always add the oil last, because adding it before you season everything will reduce the effectiveness of the seasonings, as the oil will sort of 'repel' everything.

Step 10.
Enjoy!


This is a meal that you can have at home, or easily take it on the go in a zip-top bag.

Monday, April 2, 2012

Scalloped Potatoes


This is one of those staple Southern recipes that uses only a few cheap, basic ingredients. It should cost you 20 dollars or less to make and it is great as a side dish or as a main entree. 


Things you will need:
1 6”x9” baking pan (you can use other sizes, depending on how many you are cooking for)
Aluminum foil

Ingredients:

4 medium sized potatoes
1 package of sliced deli ham (optional)
5 tablespoons butter or margarine
1 cup of milk
¼ cup all purpose flour
1 teaspoon pepper
1 teaspoon salt
1 teaspoon garlic powder

Step 1:
Preheat oven to 375 degrees Fahrenheit

Step 2:
Pour milk into a small saucepan and heat on low

(Leave the milk to heat while you make your other preparations but come back to stir it ever once in a while)

Step 3:
Add four tablespoons of butter to the heating milk so that it will eventually melt when the milk is hot.

Step 4:
Use your remaining tablespoon of butter to grease the baking pan. (You can use cooking spray instead, just omit one tablespoon of butter from this recipe if you do)

Step 5:
Peel and wash the potatoes. Peeling the potatoes it optional, just make sure you wash them very thoroughly if you leave the skin on.

Step 6:
Slice the potatoes so that they are thin, round pieces (like an uncooked potato chip).

Step 7:
Put down one layer of potatoes on the bottom of the baking pan.

Step 8:
Mix the flour, pepper, salt, and garlic powder in a small bowl or measuring cup.

Step 9:
Sprinkle some of the flour mixture on top of your first layer of potatoes. If you are using ham in this recipe, break it apart and put it into the pan as well.

Step 10:
Pour some of the hot milk/butter mixture into the baking pan.

Step 11:
Continue to put down layers of potatoes, sprinkling the flour mixture and pouring the milk/butter mixture for each layer you create.

Step 12:
Put down one last layer of potatoes, but do not add the flour mixture or milk for this top layer.

Step 13:
Cover the baking pan with the aluminum foil

Step 14:
Bake covered for 45 minutes.

You can also add onions and use a fresh clove of garlic if you have any on hand.

This recipe goes very well with cheese if you have any. If you are going to use cheese, take the pan out of the oven about five minutes early and grate whatever cheese you will be using over the top. Put it back in the oven for another 5-10 minutes.